I have moved my posts from an old blog to this one and I have moved one month at a time.....I have been blogging far too long to post each one on a separate day. Enjoy the below post for the month mentioned in the tag line.

We have a friend in the hospital today, and this card is for her.
Some bright and cheery paper combined with some fun cuts with my Spellbinders Nesties. I used my JUSTRite stamp with the Celebration Phrases Demi and then spelled out the "get well soon" sentiment with the alphabet letters that come with the stamper set. It can be a little tedious, but you get the exact sentiment you want, where you want it.
SUNDAY, NOVEMBER 29, 2009
SATURDAY, NOVEMBER 28, 2009
FRIDAY, NOVEMBER 27, 2009
Something different
 Ok, a different way to do a page.....but yes, another Cross Country page....
I like the idea of putting smaller photos in a photo album style page and doing smaller "pages" within that page. In this case I picked the 4X4 squares for the layout, cut my photos to fit and placed them in the order I thought worked best to relay the story. Then I took a sheet of paper with the trees on it, cut them out to fit in the spaces remaining (again 4X4) and put them in place. I added a few embellishments and was ready to roll in a few minutes flat!
OH, and happy shopping......I am off to the store this BLACK FRIDAY morning.....see you out there....
WEDNESDAY, NOVEMBER 25, 2009
Cross Country....
 ...yes again....hey, it's all my kids do anymore....hunt and run! It was a lot more fun when they were little, so I have to scrap what they do....and this is it.
I liked the wood/road/trail effect on this paper, and the blues and greens, but didn't care for the little cars all over on the trails....so I covered up the ones you could see with little trees cut from the paper. All I did was take a circle punch and cut few "trees" out from areas where the photos would cover the "holes" I left on the paper. Using a pop-dot on each one I covered up those little cars! The stickers from SRM are see-through so the fun background shows through my title.
TUESDAY, NOVEMBER 24, 2009
Big Fish
 I am on a scrapbooking roll right now (that, and I need to catch up before my son graduates in two years....hey, that time will pass fast!)
Some fun things to work with for our fun little trip to Hayward this past summer. I outlined the edge of the paper with my marker to add a little black to the layout and tie it all together. The rest is a matter of layering some goodies together with the photos.
MONDAY, NOVEMBER 23, 2009
Team Bonding
 Another page for my book (after being on the walls at the store of course!)
Cross Country again....
I thought this birthday paper from Bo-Bunny had the perfect blend of pattern and color for y photos. With some strategically placed photos and stickers and things, you can't even tell that birthday words are on that paper!
SUNDAY, NOVEMBER 22, 2009
A Card
 This one was fun, just some scraps...truly leftover bits that, if you saw the whole sheet, you would NOT think of a Christmas card when looking at it!
When cutting away all the other parts i needed for my othe p roject I was left with a little bit of blue and white...the other colors were red and bright yellow, blues and greens! But, this is what happens when you are left with just a little bit of something....you create and adapt. After adding a little embossed stuff to the card front and the stamped images, I completely transformed the paper from its original color scheme...and the receiver is none the wiser!
SATURDAY, NOVEMBER 21, 2009
FRIDAY, NOVEMBER 20, 2009
THURSDAY, NOVEMBER 19, 2009
Age is only a number....
 Changito love.....as well as TPC Studio love.....the papers are just too fun to not play with.
The little designs in the paper from TCP is perfect for card making. I just love these little leaves...and Changito is loving hanging out in the "Woods"....lol
Simple layering, cute stamps, fun and cute paper....perfect combo. These papers are leftovers from a project from a few days ago....gotta use them all up...nothing goes to waste!
WEDNESDAY, NOVEMBER 18, 2009
Happy Birthday
 More leftovers! I have all these bits and pieces of leftovers and I just have to use them. This patterned paper is from a mini album project I did almost a year ago...yes, I save stuff that long!
Since my patterned paper had a curve cut into it already I just went with that theme. I tucked an embossed piece under the patterned piece to add a little to the background and rubbed the embossing with a foam piece dipped in my "Broken China" and "Scattered Straw" inks.
A cheery little card for a cheery Birthday.
TUESDAY, NOVEMBER 17, 2009
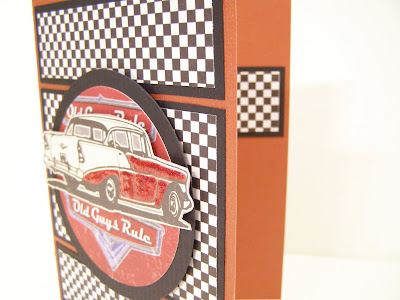
Dude birthday
 I can't resist playing with my Diamond Plate embosser...and more guy cards are being added to my collection.
We have this new paper in from a vendor we ran into at the Wausau show, it reminds me of an Oil Slick, so that is what I am calling it. It has a nice shiny surface along with the swirly oily coloring...very "manly". I used my little circles to create a raised layer of circles on the front of the card. Simple yet effective when popped up on Pop-Dots.
MONDAY, NOVEMBER 16, 2009
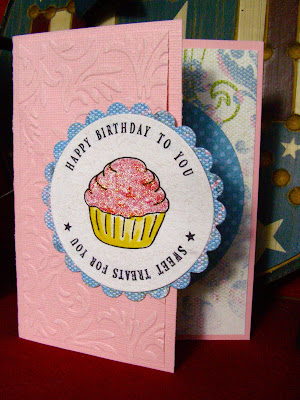
Happy Birthday to you

 A new love....my JUST Rite stamps. Like I needed a new addiction!!
When I accidentally cut too much off the end of the card I went with it...why throw away a perfectly good piece of paper just because I messed up, RIGHT? I can make it work...that's what artists do....we NEVER make mistakes.....lol.
Since the circle below would stick out behind the scalloped one in front I made sure the inside of the card was pretty too. With the circles and scallops from NESTIES, it is easy to make the circles fit perfectly with the rest. Plus, with my new JUSTRite stamps, I had the perfect circles to fit my sentiments right inside...it all works out in the end right? I just love the STICKLES sprinkles on the frosting....looks good enough to eat.
SUNDAY, NOVEMBER 15, 2009
Squirrels and trees
 More playing with the newest folders from CUTTLEBUG. I love applying color to the inside of the embossing folders and then running the paper through.
I thought this little squirrel from the Holiday 2009 collection from A*Muse would be cute with this new folder from CUTTLEBUG. I used a brayer to ink up the inside of the RAISED side of the embossing folder. Just gently apply the color so you don't get any on areas you don't want to get color on. After applying it put your paper in place and then run it through the CUTTLEBUG as usual. The color transfers to the paper beautifully. Just rinse off what didn't go with some water and let the folder dry. I colored in the stamped image with COPIC markers.
SATURDAY, NOVEMBER 14, 2009
Happy Holidays
 I got my Santa from STAMPERS ANONYMOUS out...and got creating.
Ahhh, playing with ink and stamps....what can be better...? more ink and stamps!!
I stamped out my saying and Santa and then rubbed a little of the ink around to fill in some color. When I cut the "label" out, I kept the paper in the die and then inked up the exposed parts to add more color, but left the white edge. Then I took my black marker and added a simple line around the outside to tie the black paper to the front of the card.
FRIDAY, NOVEMBER 13, 2009
THURSDAY, NOVEMBER 12, 2009
WEDNESDAY, NOVEMBER 11, 2009
TUESDAY, NOVEMBER 10, 2009
SUNDAY, NOVEMBER 8, 2009
WEDNESDAY, NOVEMBER 4, 2009
TUESDAY, NOVEMBER 3, 2009
SUNDAY, NOVEMBER 1, 2009
Christmas Tag
 Not a great photo, but darn cute anyway. I love my little snowman die from CUTTLEBUG!
I created a fun tag with some little bits of white paper and white metallic cardstock. Instead of using a swirl or snowflake pattern in the background, I went with the Victoria folder for a different look but still swirly pattern. The rest is just layering in a scenic design. Too much fun!


