I have moved my posts from an old blog to this one and I have moved one month at a time.....I have been blogging far too long to post each one on a separate day. Enjoy the below post for the month mentioned in the tag line.
Graduation Invitations
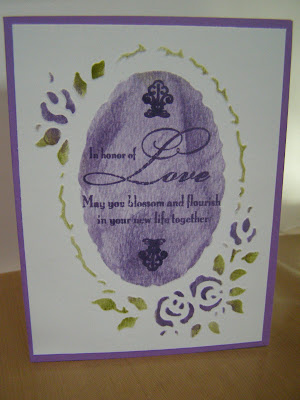
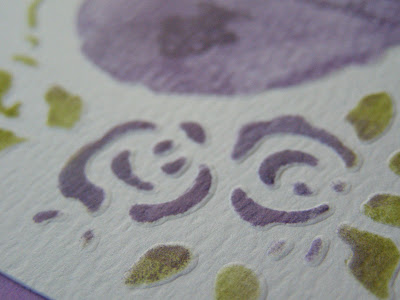
 I was working on a Graduation invitation project this week. Looks like I am a year ahead of myself right? Well, all of these ideas can be used this year and next, so I decided to make them a little more timely for our display at the store. I am even getting way ahead of myself putting my oldest child's invite for 2012 in the mix...lol...but hey, it's an example of you could do to create your own Graduation invitations for High School or College.
Each card will be detailed over the next four days, so you can see the details of each one.
WEDNESDAY, APRIL 29, 2009
Be Inspired #29 Mother's Day Card

 I needed to make some Mom's Day cards, so this challenge was easy!
Check out the Cuttlebug Challenge Blog for more details on the challenges.
If you are looking for Graduation cards...stay tuned tomorrow for my invitation collection I created this week.
I cut this card out with the PAZZLES Creative Cutter. SWEET! I then embossed the edge of the card and inked it with my FOAM Squares. The inking on the chipboard bird and branch is achieved by rubbing the chipboard across the ink pad....easy! After it dried a little, I applied the GLOSSY ACCENTS to the bird to make the colors pop. The rest is a matter of layering the elements to the card front.
The arrival of the MAYA ROAD order was perfect! These birds and branches are a great addition to a card or page. So easy to decorate too. All the goodies in the box that arrived yesterday were cool! Love chipboard, stop by the store for your fix!
MONDAY, APRIL 27, 2009
Home Sweet Home Challenge

 I needed some motivation and the CUTTLEBUG CHALLENGE BLOG was the perfect motivator. Check it out sometime if you need a little shove for your creative juices.
I haven't played with my NESTIES in a day or two so I had to get them out again. I am loving this Apron Lace punch from FISKARS too. They make a great tool!! And what card isn't complete without some CUTTLEBUG'in.
Get crafty with your tools!
SUNDAY, APRIL 26, 2009
More birthday wishes
 It's such a horrible day outside right now....perfect for making cards and doing scrapbook pages.
I made this card from some leftovers of a page kit project last week. I included a little Tim Holtz too. Can you believe it...no CUTTLEBUG!!!
Another easy card of layers and some extra doodads. Sorry the photo is a little overexposed because I had to use the flash. The red in the "B" square is darker and you can see the "birthday" stamped underneath the letters. You can see this one in the store in person for a better look. All materials area currently available at the store.
SATURDAY, APRIL 25, 2009
WEDNESDAY, APRIL 22, 2009
SUNDAY, APRIL 19, 2009
Distressed Birthday
 The silly saying on the front is a bit of a contradiction to the old fashioned look to the card, but it will work for my Dad pretty well. You won't be seeing this one in the store, this one is heading to my Dad.
 My supplies for this....love all these things....including the craft mat...my space is SOOOO much cleaner. I have this desire to see it free of all debris when I am finished so my space looks so much neater.
 I have been having a fabulous time with my new Tim Holtz toys and gadgets. Tickets, tags, and more! The distressing tool gives the edges a slightly frayed look (see above) that tearing just can't accomplish.
All items, except the ones I mentioned are from my stash, are available in the store right now.
WEDNESDAY, APRIL 15, 2009
MONDAY, APRIL 13, 2009
Tri-fold
 More playing with my CUTTLEBUG! I decided to try out a different fold....the tri-fold. I kept one end short, just to be different.
 The middle fold....add a sentiment or personal note here....
 ...and then the inside. You can layer all kinds of stuff on these cards. My favorite part is layering tons of pieces of CUTTLEBUGged shapes. A few pretty patterned papers don't hurt either.
SUNDAY, APRIL 12, 2009
Chocolate Bunnies
 Nothing like a chocolate bunny to on Easter right? This little embossed bunny is from a SIZZIX "BABY" embosser set.
Cut-N-Dry Sponges....these are awesome for applying color to embossed images....it's like my fabulous discovery of the brayer to apply ink to large surfaces...it just works better!
Stamp: HERO ARTS (I think)..I borrowed this one and didn't catch the name of it when I was working on that part. I just knew the quote was perfect for my little bunny.
SATURDAY, APRIL 11, 2009
Cuttlebug LOVE....really
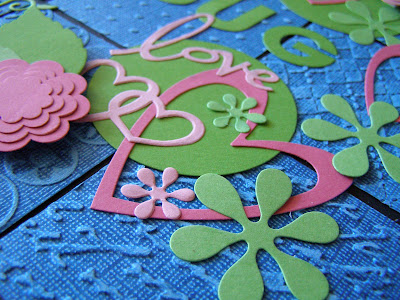
 Have I mentioned once or twice (make that million times) that we LOVE LOVE LOVE our CUTTLEBUGS? What other way to show how much we love our CUTTLEBUGS then to wear Cuttlebug Green shirts at work? It's our favorite color!
 So, what better way to highlight that love with a page completely done in CUTTLEBUG...it just screams LOVE!
Now that's a lot of CUTTLEBUG'in!! I used the CORE'dinations for the background and sanded off the raised areas...I LOVE IT!
FRIDAY, APRIL 10, 2009
Trial and error

In my effort to try just about anything in my CUTTLEBUG,
I gave a simple plastic stencil a try.

Plain plastic stencil, Cut-N-Dry foam, a craft mat, a stamp set and some ink.
 It embossed a nice image into the paper just like when we use the DREAMWEAVERS embossing stencils. Leave the stencil on the raised image and you can color the design in with a sponge square. COOL! To think, I was about to put all my plastic stencils in the CUSTOMER thrift sale at the store....not anymore!! Well, maybe a couple might make it there.
The below items are older and NOT available, but I will mention them in the event you might already own them.
Plastic stencil (Stampendous)
Stamp: Inque Boutique (sorry I bought the last set during the big sale we had in December...you had your chance....)
Roll your "sandwich" through and see what you have! Give it a try with some of your old stencils. I know you have them lying around. If you craft something using an old plastic stencil, post a reply with a link so I can see it too!
Happy CRAFTING!
TUESDAY, APRIL 7, 2009
Birthday Bugs
 Gotta play with my Cuttlebug.....everyday....
After running my paper through the embossers I rubbed my ink pad over the background dots and the Textile strips to get the really dark look to the raised areas. Pick a color that matches the paper to get the most bang out of it. In this case I had an olive color that worked pretty good with the Spring Green. To get the subtle color on the white circle and it's embossed words I used my Cut-n-Dry foam to dab on the ink and then rub lightly on the image.
MONDAY, APRIL 6, 2009
Simple Butterfly
 Keeping it simple is a good idea sometimes. I was trying out a technique from this BLOG (she is a member of the Cuttlebug Challenge Blog) and needed to put the finish on what I had started....since I actually did this embossing part almost a month ago. See, I eventually get things done......I will put all the blame on the fact that it needed to dry on my long wait to finish.
Check out the link above to see how the Glimmer Mist was used on my embossing folder. She did an excellent job of explaining it, and don't worry, the Glimmer Mist washes right off.
It's hard to see where the Glimmer Mist gathered on the folder but it basically goes into the cracks and creases. I think it works better with a more detailed embossing folder....but you never know until you try it right?? It does give a nice shimmer to plain cardstock.
So, get crafty...try something new today.
FRIDAY, APRIL 3, 2009
Cuttlebug Challenge #25
 I decided to give the latest challenge at the CUTTLEBUG CHALLENGE blog a try. I usually don't have time to do challenges in a timely manner.....give me a month and maybe I can do it....but since I got to go shopping afterwork yesterday....and I had some FREE TIME today...voila....a card is done. This weeks challenge is also co-sponsored by SHEETLOAD of Cards, check them out too when you get a chance.
I bought a nice big handful of papers from Graphic 45. Love the colors in that line.
inked the fabric buttons because they were very white, so a little dab of ink from my "Cut & Dry" sponges and they look a little more antique. I sanded the Textile Texture embossed piece to reveal the yellow side of the CORE'dinations paper. You have GOT to try that paper out. We have many different colors of this available. PICTURE THIS is a CORE STORE for CORE'dinations. We currently have Whitewash and Black Magic in packs and many of the others in single sheets. IT ROCKS!
THURSDAY, APRIL 2, 2009
Cornish Heritage Farms
 I got to break out the "Shady Daisy Backgrounder" today and did a little playing. First I inked up the stamp with a mix of yellow and browns thinking this would be a cool mix....not! Starting over. Then I inked the entire thing with just yellow....still not happy....so I inked it again with a darker caramel shade and stamped right over the top. Ok, still not happy.....one shade darker.....and voila! Then of course, I can't play without breaking out the little green machine.
WEDNESDAY, APRIL 1, 2009
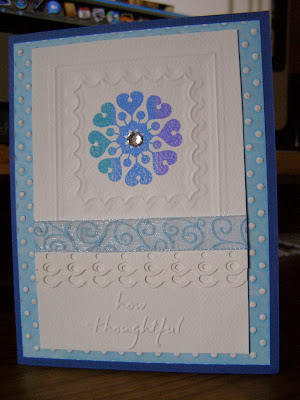
How Thoughtful

I layered a few punched edges together and overlapped them so that the dots from the back layer could be seen through the layer on top. To achieve the color on the dot piece I inked my brayer again and rolled it on the flat side of the embosser. You could try it by rolling it on the raised side for a different effect (this is where playing with your toys comes in handy...you now have permission to go play).
To get the embossed image on the front of the white piece I taped my NESTIES to the back, flipped it over and ran it through with the embossing mat. After that I stamped my flower in the middle and adhered it all in place.


